How to Fix Leaking Gutters Common Repairs
You're facing leaking gutter-fascia-and-soffit-repair-guide.html">gutter-guard-installation-cost-and-benefits.html">gutters, and tackling this issue requires a methodical approach. Start by ensuring safe access with a sturdy ladder. Inspect for clogs, damaged seams, and incorrect slopes. Gather essential tools like a caulking gun and gutter scoop. Regular inspections and clear debris quarterly. Repair loose joints and seal small holes with quality sealant. Adjust gutter slopes for ideal drainage. Curious about preventing future leaks and maintaining long-term protection? Let's explore solutions.
How to Safely Access Your Gutters
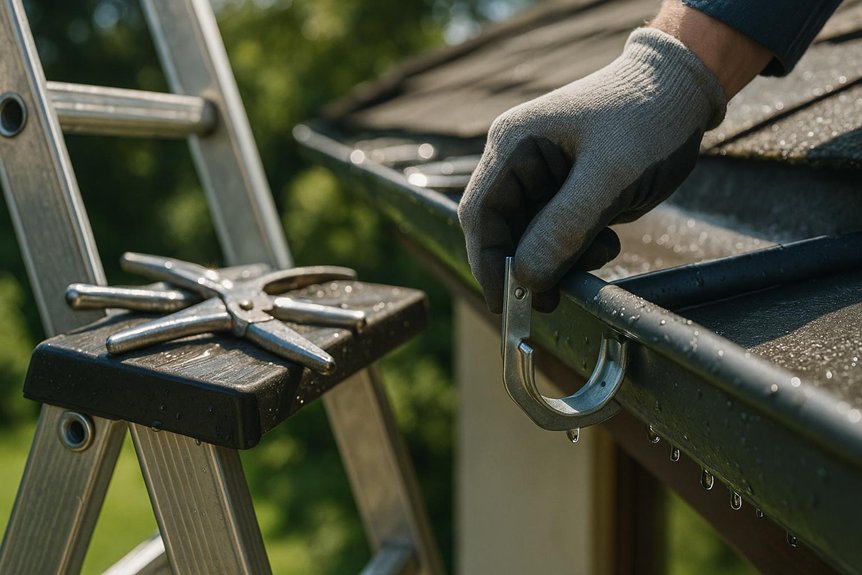
Accessing your gutters safely is essential before you begin any repair work. First, guarantee ladder safety by choosing a sturdy ladder that extends three feet above the roofline. Position it on level ground, and use a stabilizer for additional support.
Always maintain three points of contact when climbing and avoid overreaching to prevent accidents.
Once securely positioned, conduct a thorough gutter inspection. Check for debris that might cause blockages and note any visible damage. Use gloves to protect your hands from sharp edges or screws. A flashlight can help illuminate hard-to-see areas.
Why Gutters Leak: Common Issues
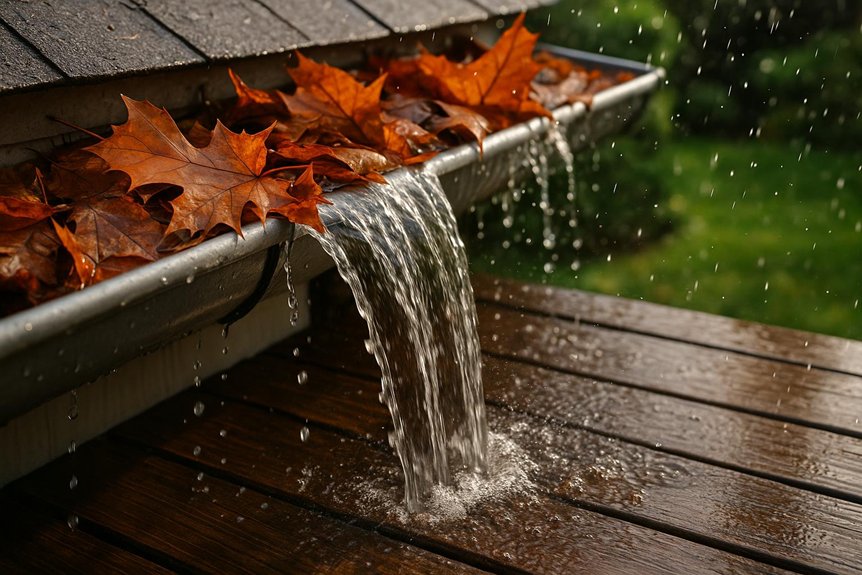
You’ll find that gutters often leak due to clogged downspouts and debris that prevent proper water flow.
Damaged seams and joints can also be culprits, allowing water to escape where sections connect.
Additionally, an improper gutter slope can cause water to pool instead of draining efficiently.
Clogged Downspouts and Debris
When gutters leak, clogged downspouts and debris often play a significant role. To prevent this, incorporate regular gutter maintenance tips into your routine.
Start by inspecting your gutters for leaves, twigs, and other obstructions. Use debris removal methods like a garden trowel or a gutter scoop to clear out the buildup.
Pay special attention to downspouts, as these can become blocked and cause water to overflow. You can flush them with a hose to guarantee water flows freely.
Consider installing gutter guards to minimize future debris accumulation. Regularly check for signs of clogs, especially during fall and spring.
Damaged Seams and Joints
Even though gutters are designed to channel water away effectively, damaged seams and joints can lead to leaks, causing significant issues. To address this, start by inspecting each seam and joint closely. Look for visible gaps or rust.
Seam reinforcement techniques, like applying a waterproof sealant, can strengthen these areas. Clean the joint thoroughly before applying sealant to guarantee proper adhesion.
For joint sealing methods, use a high-quality silicone or gutter-specific caulk. Apply it evenly along the inside and outside of the joint for best sealing. Let it cure completely before testing with water.
Regular maintenance, including checking for wear and tear, will help prevent future leaks. By addressing these issues promptly, you'll guarantee your gutters function efficiently.
Improper Gutter Slope
Addressing damaged seams and joints is essential, but another common issue that causes gutters to leak is improper slope.
You need to verify proper gutter alignment to facilitate water flow towards downspouts. Without adequate slope adjustments, water pools and eventually overflows.
To check and correct the slope:
- Measure the Slope: Use a level to verify a slight downward angle.
- Adjust Hangers: Loosen and reposition hangers to modify the slope.
- Verify Consistency: Maintain a consistent slope of about 1/4 inch for every 10 feet.
- Inspect Regularly: Regular checks help catch misalignment early.
- Consult Professionals: For complex adjustments, consider expert help.
Tools You Need for Gutter Repairs
To tackle gutter repairs efficiently, gather essential tools like a sturdy ladder, a caulking gun, sealant, and gutter patching material.
Confirm your safety with a checklist that includes gloves, safety glasses, and non-slip footwear.
Having the right equipment on hand makes the repair process smoother and safer.
Essential Repair Tools
Repairing leaking gutters requires a precise set of tools to guarantee efficiency and effectiveness. Proper equipment guarantees you tackle the job swiftly without compromising on quality.
Consider these gutter maintenance tips when gathering your toolkit. Essential gutter accessories can make a significant difference in your repair process. Here’s what you need:
- Caulking Gun: Essential for applying sealant to leaks.
- Gutter Scoop: Perfect for removing debris quickly and efficiently.
- Tin Snips: Useful for cutting metal patches to size.
- Screwdriver Set: Necessary for tightening or replacing screws.
- Plumber’s Putty: Ideal for sealing joints and seams.
Safety Equipment Checklist
When tackling gutter repairs, ensuring safety is essential to prevent accidents and injuries. Having the right equipment is important for gutter safety. Start with a sturdy ladder. Make sure it's stable and placed on a level surface. Safety harnesses are a must, especially for two-story homes. They provide an extra layer of protection if you slip.
Don’t forget protective gloves to shield your hands from sharp edges and debris. Safety goggles are also crucial to protect your eyes from falling dirt or splashes. Here’s a quick checklist:
| Equipment | Purpose |
|---|---|
| Sturdy Ladder | Secure elevation access |
| Safety Harness | Fall protection |
| Protective Gloves | Hand protection from sharp edges |
These equipment essentials will boost your safety and confidence.
Clear Clogs and Debris First
Begin by checking your gutters for clogs and debris, as these are often the primary culprits of leaks. Regular inspection is an essential step in effective gutter maintenance tips.
Use seasonal cleaning strategies to guarantee your gutters remain clear and functional. Here's a detailed approach:
- Use a sturdy ladder: Confirm it’s stable and extends beyond the roofline.
- Wear gloves: Protect your hands from sharp debris and insects.
- Clear debris manually: Remove leaves, twigs, and other blockages by hand.
- Flush with water: Use a garden hose to wash away smaller particles.
- Install gutter guards: Prevent future clogs by adding protective screens.
These steps will help maintain peak flow and prevent leaks, assuring your gutters work efficiently year-choose.html">round.
Fix Loose Joints to Stop Leaks
To fix loose joints and stop leaks, first inspect your gutters to identify any gaps or misalignments.
Apply a waterproof sealant to these problem areas, ensuring it covers all seams.
For added stability, reinforce the joints with screws to secure them tightly.
Identify Problem Areas
Even though gutters are designed to channel water away efficiently, loose joints can lead to frustrating leaks. To stop these leaks, you need to identify problem areas using precise gutter inspection techniques.
Start by visually examining the entire gutter system. Look for any visible gaps or misalignments at the joints. Use seasonal maintenance tips to guarantee regular checks, especially after heavy rain or snow.
Here are some practical steps to pinpoint issues:
- Check for water stains on the exterior walls.
- Inspect seams for visible gaps.
- Look for rust or corrosion around joints.
- Examine fasteners for any missing or loose screws.
- Observe water flow during rainfall for uneven drainage.
Use Sealant Properly
Properly using sealant is essential for fixing loose gutter joints and stopping leaks. First, choose the right sealant type. Silicone sealants offer flexibility, while polyurethane options provide durability. Clean the joint area thoroughly to guarantee the sealant adheres well. Apply an even bead along the joint, using a caulking gun for precision. Smooth it with a putty knife to eliminate air pockets. Allow the sealant to cure as per the manufacturer's instructions.
| Sealant Type | Benefits | Application Technique |
|---|---|---|
| Silicone | Flexible, Waterproof | Use caulking gun |
| Polyurethane | Durable, Long-lasting | Smooth with putty knife |
| Acrylic | Easy to paint | Apply evenly by hand |
Proper application techniques prevent future leaks, ensuring your gutters function effectively.
Reinforce With Screws
Secure gutter joints by reinforcing them with screws to effectively stop leaks. This gutter maintenance tip guarantees a snug fit, preventing water from escaping through loose connections.
Begin by identifying the joints needing attention. Use galvanized screws for their rust-resistant properties, critical for long-term leak prevention strategies.
Here’s how to get started:
- Inspect joints: Look for gaps or misalignments at each joint.
- Select the right screws: Choose screws that are long enough but not too long to avoid damaging the gutters.
- Pre-drill holes: This prevents the metal from splitting and guarantees a precise fit.
- Secure screws firmly: Tighten until snug, but avoid over-tightening.
- Check alignment: Confirm gutters are still properly aligned post-repair.
These steps enhance gutter durability and performance.
Seal Small Holes and Cracks
When you're dealing with small holes and cracks in your gutters, it's crucial to address them promptly to prevent further damage. Start by cleaning the affected area thoroughly. Use gutter maintenance tips like removing debris and drying the surface completely. Apply a high-quality sealant using precise sealant application techniques. A caulking gun can help you fill the gaps evenly. Smooth the sealant with a putty knife for a seamless finish.
Here's a quick emotional guide:
| Problem | Emotion |
|---|---|
| Leaking Gutters | Frustration |
| Quick Fix | Relief |
| Durable Repair | Satisfaction |
Allow the sealant to cure as per the manufacturer’s instructions. Regular inspections can prevent future leaks, ensuring your gutters remain in top condition.
Repair Larger Gutter Breaks
Tackle larger gutter breaks by evaluating the extent of the damage. Assess whether the break is isolated or affects multiple sections.
Depending on the gutter materials, your repair techniques will vary. Aluminum and vinyl might require different approaches than steel.
Aluminum and vinyl gutters demand distinct repair methods compared to steel.
Start by removing any debris that could interfere with repairs. Cut a patch from matching gutter materials to cover the break. Secure it with rivets or screws for stability. Apply a sealant around the edges to prevent future leaks.
Implement these steps:
- Inspect thoroughly: Look for cracks or separations in the gutter.
- Choose the right patch: Match your gutter materials for consistency.
- Clean the area: Confirm it's free of dirt and debris.
- Attach securely: Use appropriate fasteners.
- Seal effectively: Apply a waterproof sealant.
Need a Gutter Contractor?
Find licensed gutter professionals in your area. Cleaning, repair, and installation available.
Find Gutter ProsCall (866) 314-4362When to Call a Professional for Help
Ever wondered if it's time to bring in a professional for your leaking gutters? If your gutter issues are beyond basic repairs, like persistent leaks or complex system failures, it might be wise.
Some problems, such as sagging gutters or water damage, require specialized skills and equipment that professional services provide. Using expert gutter maintenance tips, professionals can diagnose hidden problems that DIY efforts might miss.
If you're dealing with high roofs or extensive gutter systems, safety becomes a concern, making professional help crucial. They guarantee that repairs are up to code and often provide warranties on their work.
Don't risk further damage or injury; evaluate the situation objectively. When in doubt, calling an expert is a practical step towards effective, long-term solutions.
Replace Damaged Sections
Identifying and replacing damaged sections of your gutters is essential for maintaining an efficient drainage system.
Start by inspecting your gutters thoroughly for cracks or holes. Use high-quality gutter materials that match the existing system for seamless integration. Employ proper repair techniques to guarantee durability and functionality.
Here’s a practical guide to help you:
- Evaluate Damage: Look for visible cracks or sagging sections.
- Select Materials: Use aluminum or vinyl, matching existing gutters.
- Measure Accurately: Guarantee precise cuts for a perfect fit.
- Install Securely: Use screws or rivets for stable attachment.
- Seal Joints: Apply waterproof sealant to prevent leaks.
How to Fix Rust and Corrosion in Gutters
To tackle rust and corrosion in gutters, start by identifying areas where damage is visible or suspected.
Clean these sections thoroughly, removing any debris and rust flakes.
Then sand the surface to guarantee proper adhesion.
Finally, apply a rust-resistant coating to protect and extend the gutter's lifespan.
Identify Affected Gutter Areas
Spotting rust and corrosion in your gutters early can prevent extensive damage and costly repairs.
Begin by using effective gutter inspection techniques to locate problem areas. Check for rust spots and bubbling paint, which indicate corrosion. Use a water flow assessment to see if water is pooling or leaking at specific points. This can highlight areas where rust may have weakened the gutter.
- Inspect seams and joints: These are common places for rust to start.
- Look for discoloration: Rust often causes a reddish-brown stain.
- Check for flaking or peeling paint: This can reveal underlying rust.
- Examine downspouts: Rust may originate here due to frequent water exposure.
- Assess water flow: Confirm it's not obstructed, as this can exacerbate corrosion.
Clean and Prepare Surface
Begin by thoroughly cleaning the affected gutter areas to guarantee proper adhesion of repair materials. Use a sturdy brush and mild detergent to scrub away dirt and debris. Rinse with water, making sure all residues are gone.
To address rust and corrosion, scrub the metal surface with a wire brush, focusing on deteriorated spots. This gutter maintenance tip is essential for effective repairs.
After cleaning, inspect the gutters during seasonal inspections to catch any early signs of damage. Pay attention to seams and joint areas.
Remove any remaining rust flakes with sandpaper or a rotary tool. This step prepares the surface for future repairs and prolongs gutter lifespan.
Regular upkeep helps prevent costly issues and guarantees your gutters remain in peak condition.
Apply Rust-Resistant Coating
When dealing with rust and corrosion in gutters, applying a rust-resistant coating is crucial to protect the metal and extend its lifespan.
First, choose a high-quality rust prevention product designed for outdoor use. Before applying, verify the surface is clean and dry to allow proper adhesion.
Use a brush or sprayer for even application, focusing on seams and joints where corrosion often begins. Allow adequate drying time before exposing the gutter to moisture.
- Select a rust-resistant primer: Guarantees durability and protection.
- Clean and dry thoroughly: Prevents moisture from trapping.
- Use proper coating techniques: Brush or spray for uniform coverage.
- Focus on vulnerable areas: Seams and joints need extra attention.
- Allow complete drying: Critical for effective rust prevention.
These steps will greatly enhance your gutter’s longevity.
Make Sure Your Gutter Slope Is Right
Ever wonder why your gutters aren't draining properly? It might be due to incorrect slope. Ensuring the right slope is essential for effective water drainage.
Start by checking your gutter materials; aluminum and vinyl are common choices and can affect adjustments. Use a level to measure the slope, which should drop about 1/4 inch for every 10 feet towards the downspout.
To adjust, loosen the gutter hangers and slightly tilt the gutter to achieve the desired slope. Tighten the hangers once the slope is correct. This encourages water to flow efficiently, preventing pooling and leaks.
Regularly inspect and adjust as needed, especially after storms or heavy debris accumulation, to maintain peak performance and avoid costly damage.
Prevent Future Leaks With Gutter Guards
While guaranteeing the proper slope helps with drainage, installing gutter guards can greatly reduce the risk of future leaks.
Installing gutter guards effectively minimizes the chances of leaks by ensuring efficient drainage.
Gutter guard benefits include preventing debris buildup, which can cause water overflow and leaks. You’ll want to choose guards that fit your gutter type and climate.
Here are some installation tips:
- Select the Right Material: Opt for aluminum or stainless steel for durability.
- Measure Accurately: Confirm guards fit snugly without gaps.
- Secure Properly: Use clips or screws to prevent movement.
- Check for Compatibility: Make sure guards don’t interfere with roof shingles.
- Inspect After Installation: Confirm they’re properly aligned and secure.
Maintain Gutters for Long-Term Protection
To guarantee your gutters provide long-term protection, consistent maintenance is essential. Start with seasonal inspections to identify potential issues early. Clear debris to prevent blockages and make certain downspouts direct water away effectively. Tighten loose fasteners to maintain structural integrity. Apply these gutter maintenance tips regularly to extend the life of your system.
| Task | Frequency | Tools Needed |
|---|---|---|
| Clear Debris | Quarterly | Ladder, Gloves |
| Check Fasteners | Bi-annually | Screwdriver, Wrench |
| Inspect Seals | Annually | Sealant, Caulk Gun |
| Test Downspouts | After Rainfall | Hose, Water Source |
Regular attention helps prevent costly repairs. By integrating these practices into your home care routine, you’ll make certain your gutters stay effective year-round, safeguarding your property from water damage.
Keep Your Home Dry and Protected
A reliable gutter system is essential for keeping your home dry and protected from water damage. Proper maintenance helps prevent leaks and costly repairs.
Here are some gutter maintenance tips for effective water damage prevention:
- Inspect Regularly: Check for clogs, rust, and sagging sections at least twice a year.
- Clean Debris: Remove leaves and twigs to prevent overflow and guarantee water flows smoothly.
- Seal Leaks: Use waterproof sealant on joints and seams to stop leaks.
- Confirm Proper Slope: Make sure your gutters slope downward to facilitate drainage.
- Install Gutter Guards: Prevent debris accumulation with guards, reducing maintenance needs.
Frequently Asked Questions
How Can Weather Conditions Affect Gutter Repairs?
Weather conditions greatly affect gutter maintenance. During heavy rain, inspecting for leaks is essential.
Seasonal impacts like winter freezing can cause expansion and contraction, leading to cracks. In autumn, falling leaves may clog gutters, necessitating frequent cleaning.
Confirm repairs during dry weather to allow sealants to cure properly. Regularly check for rust in humid conditions, and reinforce joints before storms to prevent leaks.
Adapting to weather guarantees efficient repairs.
Are There Eco-Friendly Sealant Options for Gutters?
Yes, there are eco-friendly sealant options for gutters.
Look for sealants made from eco-friendly materials like silicone or water-based formulas. These options provide effective gutter maintenance by preventing leaks without harming the environment.
Apply the sealant to clean, dry surfaces for the best results.
Make certain you follow the manufacturer’s instructions for maximum durability and performance, keeping your gutters functional and sustainable.
What Materials Are Best for DIY Gutter Repairs?
For DIY gutter repairs, use materials like aluminum, vinyl, or galvanized steel.
These common gutter materials offer durability and ease of handling. Apply a high-quality sealant for joints and seams to guarantee watertight connections.
Keep in mind gutter maintenance tips: regularly clean debris to prevent clogs and inspect for rust or damage.
It’s also wise to have a ladder and safety gear ready for safe access and repair.
How Do I Choose the Right Gutter Repair Professional?
Look for a gutter repair professional by checking their qualifications and confirming they’re licensed.
Evaluate their professional experience by asking about past projects and requesting references.
Verify they've insurance to protect against accidents.
Compare multiple quotes to guarantee fair pricing.
Make certain they offer a warranty for their work, assuring reliability.
Can I Paint My Gutters After Sealing Them?
Yes, you can paint your gutters after sealing them. First, confirm the sealing techniques have fully dried and cured.
Clean the gutter surface thoroughly to remove any debris or oils. Use a primer specifically designed for metal surfaces to enhance adhesion.
Once the primer dries, apply a quality exterior paint suitable for metal. This approach guarantees your gutter painting project is durable and visually appealing, protecting against weather elements.
Browse our national gutter directory to find certified professionals near you. See pricing guides for Jacksonville, Silver Spring, Baltimore, Fort Myers, Orlando, and more.